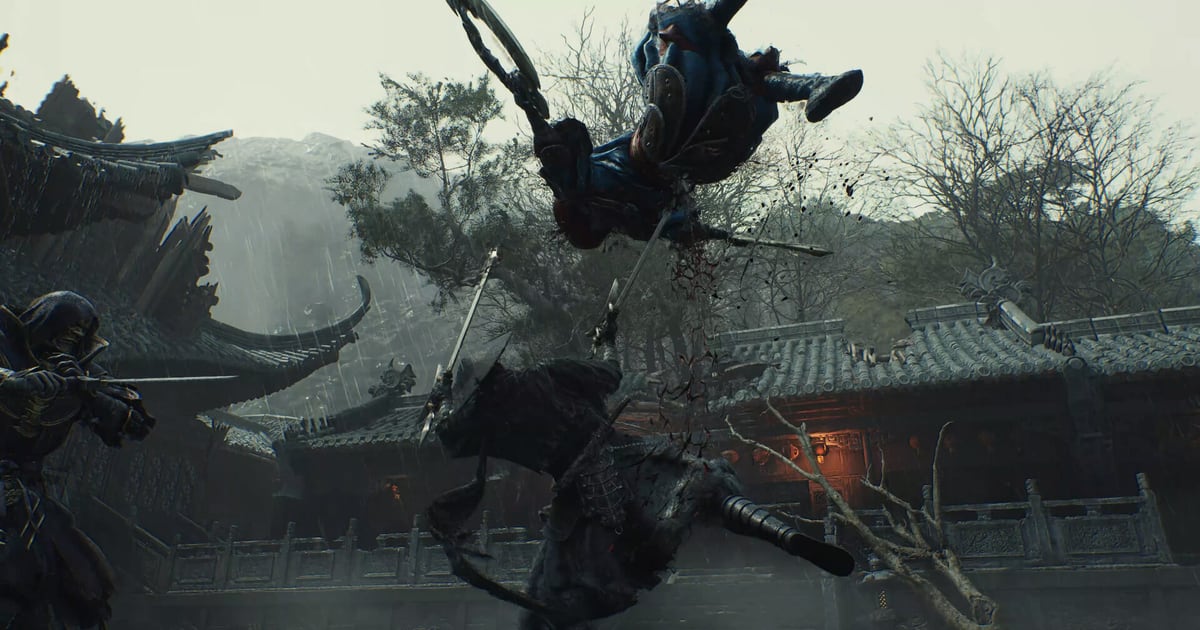
Phantom Blade Zero is out, and the first thing that separates a clean boss kill from a messy one is not the size of your damage number. It is whether you read the colour of the swing. S-GAME Studio built the combat around one defensive button, a shared stamina-and-stagger pool, and weapons that refill that pool when you switch them — see those three systems as one loop and the large roster stops being overwhelming.
What this covers: the L1 block/parry window and its partial-parry fallback, the red-glow dodge and blue-glow parry split, how Sha-Chi doubles as a stagger meter, how Remnant Sparks gate Phantom Edge use, and which weapon families to invest in. Why it matters: weapon levels can be reverted for free, but Soul Tempering cannot be undone, so the cost of choosing badly is paid much later than the choice. Who should care: anyone who has cleared the first few bosses and is deciding where to spend Remnant Dust, and anyone still holding L1 down through every combo.
The defensive window is one button, two colours
The control list maps a single action to Block/Parry, and holding it keeps the guard up. A tap timed to the strike is something else entirely: Game8’s timing guide says to press the button “just before the enemy’s attack lands”, and describes the result as a perfect parry that “removes all damage and Sha-Chi consumption from the hit”. Pressing early or late does not simply fail — it produces a partial parry, which deals less damage when the enemy is staggered. That is the whole skill gap: the game does not punish a mistimed parry with a hit, it punishes it with a worse stagger payoff.
The colour code decides which defensive input is even legal.
| Telegraph | Correct input | Reward for perfect timing | What a partial answer costs |
|---|---|---|---|
| Red glint | Dodge (R1) | Perfect dodge triggers a Ghoststep | Red attacks “cannot be parried or blocked” — a guard is not an option |
| Blue glow | Parry (tap L1) | Perfect parry plus a Ghoststep | Blue attacks “can’t be blocked normally”, so a held guard gives nothing |
| No glow, single hit | Parry or held block | Perfect parry zeroes damage and Sha-Chi cost | A partial parry staggers the enemy less |
| No glow, long chain | Held block | Survives the sequence | Holding drains Sha-Chi continuously, and each absorbed hit drains more |
Ghoststep is the payoff either way. A parried blue attack or a perfect dodge on a red attack moves Soul “behind the enemy”, leaving them open to a follow-up from behind. The boss guide’s advice to parry rather than dodge blue attacks is economic, not stylistic: a parry “also severely depletes the attacker’s Sha-Chi”, while dodging merely avoids the hit.
One naming note: the store page’s action list reads “Dodge, deflect, counter, and strike”, but the control table has no separate deflect binding. The timing-critical defensive action is the L1 block/parry — if you have been hunting for a deflect key, you already have it.
What Sha-Chi actually governs
Sha-Chi is not just stamina. Game8 describes it as serving “both your stamina gauge and stagger meter”, and that applies to enemies as well as to Soul. Empty a boss’s Sha-Chi and they are open; empty your own and you are “stunned, immobile, and vulnerable to damage”.
The costs are lopsided, and knowing which side of the ledger each action sits on is most of the learning curve.
| Action | Effect on your Sha-Chi | Effect on the enemy |
|---|---|---|
| Perfect parry | None spent | Heavily depleted |
| Partial parry | None spent | Depleted less than a perfect parry |
| Held block | Slow constant drain, plus extra drain per absorbed hit | None |
| Dodge | None | None |
| Power Surge | Spent from that weapon’s own pool | Chips enemy Sha-Chi; Power Surges “cannot be blocked by enemies” |
| Weapon swap | Instantly refilled on the incoming weapon | None |
Two consequences follow. Defence is not passive: a held guard is the only defensive action that spends your Sha-Chi, and the one that leaves you unable to act if it empties. And the swap is a resource, not a preference. Each weapon carries its own Sha-Chi gauge, and swapping “immediately restores Sha-Chi” on the incoming weapon — but the outgoing weapon enters a cooldown before you can swap back, and Game8 notes that cooldown is “pretty long during the early game”. The swap buys a burst window, not an infinite loop.
Max Sha-Chi itself is upgradeable: whole Sha-Chi Ambers found around the map permanently raise the cap. The closest analogue on this site is the posture economy in the Nine Sols parry guide; the difference is that Phantom Blade Zero lets you refill by switching weapons mid-fight.
Three weapon families, two slots, one guard-break stat
Phantom Blade Zero ships with “over 30 primary weapons and more than 20 unique Phantom Edges”, according to the Steam store description. The main weapons split into three families, and you can carry two of them at once.
| Family | What it does | Stated strength | Stated trade-off |
|---|---|---|---|
| One-Handed | Single weapon with its own attacks, combos and techniques | Balance between attack speed and damage; easy to pick up | Nothing beyond that balance — it is the compromise family |
| Dual-Wield | Paired weapons, consecutive attacks from both hands | Fast attack speed, strong during guard breaks | Sha-Chi consumption: the White Serpent & Crimson Viper is flagged for it |
| Two-Handed | Both hands, generally powerful strikes and heavier attacks | Heavier strikes per swing | No speed advantage; you are committing to each swing |
Every main weapon carries three stats: Damage, Guard Break, and — on some — Status Effects such as Bleed. Guard Break is the one players underrate, because shields do not care about your damage number. The shield guide is blunt: use “destructive weapons like the Dread Axe”, stack accessories that raise guard break, and spend Blackstones, which “permanently increase Soul’s attack power and guard breaking”. Guard break is a second, separately funded damage stat rather than a byproduct.
Here is Game8’s ranking of the best weapons as of reaching Meigu Lake, in the site’s own order. Values are the site’s listed Damage / secondary-stat pairs.
| Weapon | Family | Damage / secondary stat | Signature effect | Where it comes from |
|---|---|---|---|---|
| Baishan Stormswords | Dual-Wield | 312 / 142 Status Effects | Deals Lightning damage and inflicts Paralysis, which raises the damage of your Sha-Chi attacks | Yubi (optional boss, Mandate Encampment) |
| Outlaw Warblade | Two-Handed | 240 / 106 Guard Break | Lifesteal, at the cost of life drain on Sha-Chi attacks | Jing Ye (main boss) |
| White Serpent & Crimson Viper | Dual-Wield | 260 / 110 Guard Break | Power Surge spins one blade around you — AoE protection | Bai Chilian (main boss) |
| Fiend Saws | Dual-Wield | 302 / 120 Guard Break | Fiend Form: 1 Sha-Chi Essence for 10 seconds of unblockable attacks | Iron Fiend and Jade Dancer (main bosses) |
| Wild Oriole Sword | One-Handed | 295 / 104 Guard Break | Power Surge: an unblockable flurry of sword strikes | Mu Xiaokui (main boss) |
Every one of those is a boss drop, which is the point: the roster unlocks by clearing fights, not in the order you would choose it.
Boss archetypes: what the four type labels are worth
Game8’s boss catalogue tags every encounter with one of four types: Masters, Perfect Transcensions, Maskwalkers, and Puppets. The tags are used across both main and optional fights.
| Type | Main-story examples | Optional examples | What it tells you |
|---|---|---|---|
| Masters | Zuo Shang, Master Bi Yuan, Master Bi Hai, Iron Fiend and Jade Dancer, Mu Xiaokui | The Gold-Masked One (twice) | The only optional boss that returns for a second encounter |
| Perfect Transcensions | The Hunt (twice), Zhuo Bi, Blaze, Cavalrybane, Wu Xuan | Wan Jun, Red, Wu Lengshuang, Chief Disciple of the Seven-Stars | The only type with a repeat encounter on the main path |
| Maskwalkers | Jagged Steel, Peng Meng, Hua Qianxiao, Jing Ye, Stone Hand Iron Fever, Bai Chilian, Gu Wanyue | Acolyte Yanru, Dusk the Puppeteer, Corpse-Eating Xue | Supplies six of the main path’s weapon rewards, the most of any type |
| Puppets | Yuzan | Hua, Aberrant Three-Faced Puppet, Yubi | The one type with a documented weapon immunity |
That last row is the only weapon-versus-archetype rule the sources actually state, and it is worth respecting: Jagged Steel’s Power Surge “has no effects on Puppets, Golden Bodies, or Phantom Bodies”, so the early Bleed build quietly stops working against a Puppet boss. Against everything else the sources do not document per-type resistances, so treat the type labels as routing information and your stat lines as the real damage answer.
The Phantom Edge economy: Remnant Sparks
Phantom Edges are the secondary slot: up to two equipped alongside your two main weapons, split into Ranged, Destructive, Martial, Artifice and Summoning. They are not free damage. Activating one with R2 draws on that Edge’s own resources, and Game8’s list notes that “Phantom Edge attacks can consume Remnant Sparks, with the required amount depending on the weapon”.
Remnant Sparks are the most constrained currency in the game. The recovery guide says interacting with bells is “the only known way” to restore them, and bells also refill your Healing Gourd and medicine uses; some weapons top them up mid-fight at the cost of staying in combat. The rule follows: clear a zone, ring the bell, then start the boss with a full stock.
| Type | Combat role | Documented non-combat use |
|---|---|---|
| Ranged | Projectile attacks at distance | Shoot distant objects or targets to reveal items |
| Destructive | Heavy guard-break swings | Break weakened floors, destroy obstacles, sever chains |
| Martial | Specialised combos at varying range | The Hunter’s Chain Sickle reaches grapple points |
| Artifice | Unconventional devices and effects | Varies by item; the Heartened Pipa hits enemies shrouded in mist |
| Summoning | Summons that draw aggro | None established |
There is a skill-shaped escape hatch. Game8’s early build lists Flowing Chi: when a regular enemy uses a ranged red-flash attack, or is below half health while guard-broken, “certain Phantom Edges can be used at the right moment to counter or perform a follow-up attack without consuming Remnant Spark”. That is the difference between an Edge as a consumable and an Edge as a tool.
Carrying a first playthrough without wasting upgrades
The upgrade path has a trap built into its own generosity. Weapon levels are the cheap part: spend Remnant Dust and materials, and reverting a level is free and refunds what you put in. Levelling a weapon to try it therefore costs nothing permanent — do it. The permanent commitments sit elsewhere.
| Investment | Currency | Reversible? | When to spend it |
|---|---|---|---|
| Weapon levels | Remnant Dust plus materials | Yes — reverting is free and refunds materials | Freely, on anything you want to test |
| Soul Tempering | Weapon-specific materials plus Remnant Dust | No — “Soul Tempering is irreversible” | Only on the weapon you intend to finish the game with |
| Blackstones | Fragments found in the world | No — permanent attack and guard-break increase | As soon as you have a whole one |
| Sha-Chi Ambers | Fragments found in the world | No — permanent max Sha-Chi increase | Immediately; there is no downside |
Soul Tempering unlocks at Pengzhen around Chapter 4 with the NPC Myst, and it “may even transform a weapon into an entirely new form” — which is exactly why it should never be your first experiment. Everything else is a rental; this is a purchase.
For the loadout itself, the safest shape is one high-damage main weapon plus one high guard-break partner, with a Destructive Phantom Edge covering shields. Game8’s early build lands on Jagged Steel as the damage source, the Scarlet Wraithblade as the shield answer so you need not lean on the Dread Axe, and the Dread Axe and Hunter’s Chain Sickle filling the two Edge slots. All of it is obtainable in Weeping Creek Valley after The Hunt, the second entry in the main-boss order — early enough to cover most of the campaign.
Later, both of the site’s recommended combinations put the Baishan Stormswords in the main-damage slot: one pairs them with the Outlaw Warblade as the shield-and-heal secondary, the other with the White Serpent & Crimson Viper for its rotating Power Surge. Note the ordering problem: the Stormswords are a Yubi drop from the Return to Pangzhen stretch at the end of the boss order, so they are not a plan you can build around in the opening hours. Jagged Steel is.
One last habit: use Power Surge to break Sha-Chi, not to cash in on a broken enemy. The beginner guide’s reasoning is that Power Surges cannot be blocked and chip large amounts of enemy Sha-Chi, so they are most effective “when enemies are not staggered” — a staggered enemy is already the reward.
Patch state and platforms
At the time of writing the only build in players’ hands is the launch build plus the day-one patch. S-GAME confirmed a roughly 5 GB first-day update — cutting load times, improving rendering performance and fixing bugs — in a Bilibili post relayed by PlayGround.ru through Steam’s news feed. The same report carries a driver advisory: S-GAME’s testing found NVIDIA driver 617.42 the stable option and warned that the newer 621.01 “may lead to unstable performance”. Nothing there changes a combat value, so no timing advice on this page is patched out; no numbered post-launch patch notes appeared in the feeds checked for this piece either.
Platforms are PS5 and PC, the latter through Steam and the Epic Games Store — the set the official site links to. Game8 reports no Xbox version at launch, citing timed PS5 console exclusivity lasting at least 12 months. Steam’s page carries a Metacritic score of 88.