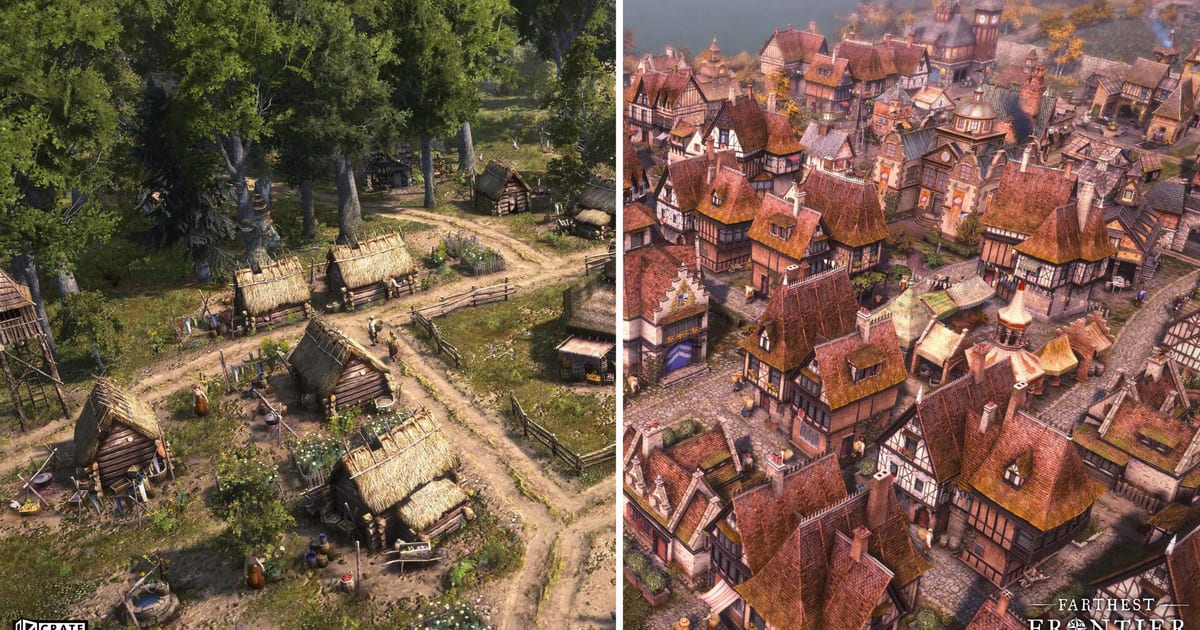
Farthest Frontier asks you to grow a settlement from a handful of villagers into a town of hundreds, and the first winter is where most of those runs are decided. The game gives you three overlapping pressures to manage at once: keeping people fed, keeping them happy enough to upgrade their homes, and keeping them alive against wildlife and raiders. This guide walks through those systems in the order they actually bite, based on how the game behaves.
Site selection before you build
The community wiki documents three overlay keys you should use before you place your Town Center: F for Fertility, I for water, and G for Desirability. These overlays matter more than they look like they should, because almost every productive building downstream depends on at least one of them.
Fertility determines how well your crop fields perform, so you want your Town Center close to fertile ground for fields. Water determines fishing, wells, and the placement of certain production buildings. Desirability determines whether houses can upgrade to higher tiers, and higher tiers pay more tax and hold more luxury goods, so clustering homes near desirability-positive features early saves you expensive reshuffles later. The building placement interface turns red with tooltips when a building cannot go where you are trying to put it, so let the red state do the teaching.
The food chain, in order of urgency
Food is the first system that will end a run, and Farthest Frontier offers several sources that spoil at different rates. The official loading tips spell out the tradeoffs, and they are worth taking literally.
Berries are the early bridge. They are labor-intensive to collect and spoil quickly, but they cost no infrastructure, so they buy you time in the first seasons. Treat them as a supplement, not a foundation.
Hunting supplies meat, hides, and tallow. You can select your hunters and right-click a specific animal to direct them, which matters for taking down a wild boar that hunters will not engage on their own. As the loading tip notes, once hunting can no longer keep up with demand for meat, hides, and tallow, it is time to transition to livestock.
Crops are the staple. Some crops produce more food but keep less well in storage, so pair high-yield crops with preservation. Match crops to their preferred soil type using the Fertility overlay for higher yields.
Preservation is what turns a fragile food economy into a stable one. Grain and flour keep for years in a Granary, but flour spoils faster than grain and bread spoils quickly, so store grain rather than flour where you can. Fresh fish and meat spoil fast but keep for long periods once cured in a Smokehouse. Milk spoils quickly, but cheese stores for a very long time, so a cheese chain is one of the best long-term food investments.
One efficiency tip from the community that the game’s mechanics support directly: Smokehouses default to a 1:1 fish-to-meat production ratio. If your smokehouse is near only meat but you have fish elsewhere, the smoker will travel across the map to make both equally. Switch the ratio to 1:0 on smokehouses that should focus on one input, and you stop the wasted travel.
Desirability and the housing upgrade ladder
Desirability is the second pressure, and it is the one new players most often underestimate. Houses in Farthest Frontier upgrade through tiers as your town grows and as their surroundings become more desirable. Early homes are crude log huts; later tiers are substantially larger and visually distinct, and they function better too. Providing higher-tier houses with luxury goods increases your tax income, which is the engine that funds everything else.
The practical implication is that you should plan your housing blocks around what raises desirability rather than dropping houses wherever there is space. Buildings that pollute or generate waste lower the appeal of nearby plots, so keep industrial buildings away from residential clusters. A little spacing and a few decorative elements early on prevent a costly rebuild when you realize a row of homes cannot upgrade because a tannery moved in next door.
Waste management ties into the same system. The loading tips are explicit: waste build-up in houses leads to increased rat populations and disease. Granary-stored grain and flour help limit rodents, and keeping housing clear of accumulated waste keeps your population healthy. Disease can gut a town faster than a raid if you let waste and rats compound.
The trading post as an economic lever
The Trading Post is where the food and desirability chains connect to the wider economy. Two facts from the loading tips are especially useful. First, food does not spoil while stocked in a Trading Post, which makes it a safe overflow buffer as well as a trade venue. Second, profit can be made by purchasing raw materials and converting them into more expensive products, so a Trading Post near your processing buildings turns imported inputs into exported value.
Because wagons require roads to pick up and stock resources, place stockpiles so the closest stockpile to a mine or workcamp is also close to the relevant processing facility. Wagons collect from remote sites and dump at the nearest stockpile, so a little thought about stockpile placement saves a lot of hauling time.
Defenses that carry you past the first winter
Winter is when food income drops and when raid pressure tends to test your walls. The defense ladder in Farthest Frontier is tiered the same way the economy is.
Towers handle the smaller early raids. They are cheap and they buy time, but they are not enough on their own against anything substantial.
Guard Towers extend protection to work sites outside the town core, which matters because hunters, miners, and workcamp laborers operate away from your walls. A Guard Tower near a remote work area keeps animal attacks from interrupting production.
Barracks and soldiers are the answer to armored opponents. The loading tips are direct: soldiers can be deployed from the Barracks to destroy wolf dens, heavy weapons help soldiers dispatch armored enemies faster, and towers alone will not deal with more armored raiders. Crude weapons sold by merchants are better than nothing at the start, but you want a proper garrison before winter deepens.
Hide coats are a quiet but important defense layer. Villagers, and hunters especially, outfitted with hide coats stand a better chance of surviving animal attacks unscathed, which protects your labor force.
A note on herd management that doubles as defense and food economy: animal herds replenish the more trees their area has, and they stop replenishing if you remove the trees. If you have enough gold to plant trees, you can effectively create self-renewing deer herds farmed by nearby hunters. Do not clear-cut near your herds, or they deplete.
A sane development order
Pulling the systems together, a reliable opening sequence is: pick the Town Center spot using the F, I, and G overlays; start with berries and a hunter cabin for early food; lay out crop fields on fertile soil; build a Granary and a Smokehouse as soon as you can afford them; zone housing away from industry with desirability in mind; stand up a Tower and a Guard Tower for early defense; and only then invest in a Trading Post and livestock. That order keeps food stable through the first winter, gets desirability compounding early, and gives you soldiers by the time raiders arrive in force.
Mid-game levers and performance notes
Once the first winter is behind you, two levers drive growth. The first is the arborist and livestock transition: fruit trees are a productive way to use less fertile land, though fruit spoils quickly unless preserved, and livestock replaces hunting for sustained meat, hides, and tallow. The second is the wagon network, which lets you harvest and haul from distant work camps and mines efficiently. Wagons collect from remote sites and dump at the nearest stockpile, so routing roads from outlying camps to stockpiles near your processing buildings is where the real throughput gains appear.
On performance, the community FAQ is candid that once a settlement grows past a certain complexity the bottleneck becomes the CPU, not the graphics card, and large map sizes carry the steepest cost. If your frame rate drops as your town grows, reducing game speed, lowering supersampling, and trimming foliage and shadows are the highest-impact levers, in roughly that order. Heavily modded towns, especially mods that touch villager AI, can also drag performance, so disabling AI-touching mods is worth testing before you accept a slow late game.