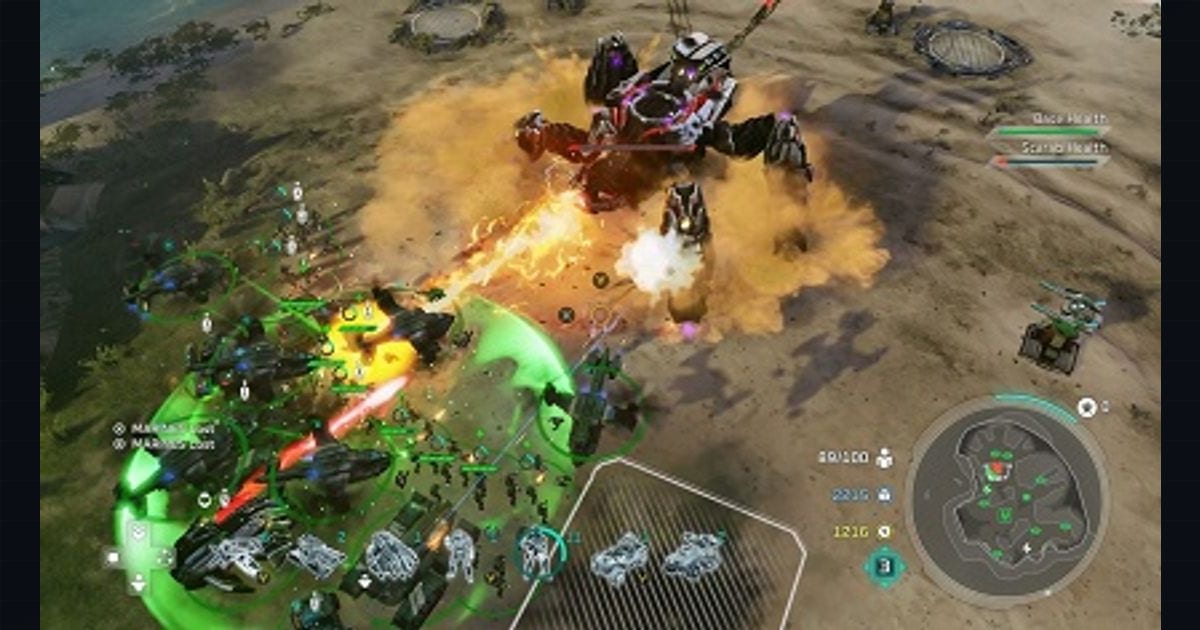
Halo Wars 2 splits its roster between UNSC leaders and Banished leaders, each with a unique tree of leader powers unlocked across five tiers. The official leader powers reference at halowars2.com documents all 16 leaders — eight UNSC and eight Banished — with per-tier costs, cooldowns, and effect numbers. This guide groups those leaders by power curve and offers build-order direction for both 1v1 and team play, grounded in what their ability trees actually reward.
The leader system
Every leader unlocks powers in a fixed order across five tiers. Tier 1 powers are cheap and available early; tier 5 powers are the leader’s signature super-unit or orbital strike. Powers are either active (purchased and targeted, with their own supply, energy, and population costs) or passive (bought once and persistently active). Understanding which leaders front-load value in tiers 1-2 versus which spike at tier 5 is the foundation of any tier ranking.
Costs are shown as Supply / Energy / Population. Veterancy is the universal combat scaling system: units gain veterancy ranks as they survive and deal damage, and several leaders (Cutter, Colony, Jerome) have passives that accelerate that rate. The interaction between veterancy boosters and high-HP units is one of the strongest force multipliers in the game.
UNSC leaders
Captain Cutter is the most economy- and veterancy-oriented UNSC leader. His tier 1 passives — Battle Hardened (+50% then +100% army veterancy rate) and UNSC Raid (faster infantry capture and movement) — let him grab minibases and pads faster, then snowball a veterancy-rich army. His tier 3 ODST Drop and tier 5 Close Air Support (Pelican gunships) give him reinforcement from anywhere. Build order: rush two base expansions with the capture bonus, layer Lotus Mines and Restoration Drones for defense, then ODST-drop onto contested points.
Professor Anders is the research-and-Sentinel leader. Her R&D passive makes a large chunk of her research cheaper and faster and grants shields to turrets and watchtowers. Her Protector Sentinel unlock (tier 2) gives her a train-able support super-unit, and her tier 5 Retriever Sentinel is a 40,000-HP beam platform. Anders wants a fast tech build: one expansion, a Reactor push, then Protector Sentinels backed by her Ark Defense patrol. Her weakness is raw early aggression, since her early tiers are utility, not strike.
Sergeant Forge is the vehicle leader. Rolling Economy cheapens his first Supply Pad and Reactor upgrades, and Accelerated Assembly passively speeds vehicle production and cuts costs on Scorpions, Grizzlies, Warthogs, Wolverines, and Fox Cannons. His tier 5 Grizzly Battalion drops three veterancy-1 Grizzlies by Pelican, and Combat Salvage recycles up to eight dying vehicles back to base. Forge’s build is vehicle-first: a fast Vehicle Depot, Accelerated Assembly, then a Grizzly timing push with Heavy Metal to keep them alive.
Isabel is the disruption leader. Holographic Decoy creates temporary fake units, and her tier 5 Ghost in the Machine temporarily hijacks enemy vehicles, aircraft, and super units. Her MAC Blast (tier 3) is a single delayed round that deletes the center of a blast. Isabel punishes armies that commit: lure them onto Lotus Mines, MAC the cluster, then Ghost their vehicles. She is strongest against vehicle-heavy compositions and weaker against pure infantry swarms.
Commander Jerome is the Spartan-inspire leader. Time for Heroes grants an Inspire buff under a population threshold, Recon Sight widens vision, and his tier 5 Omega Team drops three hero Spartans (Robert, Leon, August) with anti-air, anti-vehicle, melee, and hijack tools. Field Promotion (tier 5) instantly promotes nearby allied units to veterancy 1. Jerome wants a low-pop, high-quality army that stays under the Inspire threshold, then an Omega Team finisher.
Sergeant Johnson is the defensive-mech leader. Digging In makes his Bunker Drop and Siegesiege. A timed, large-scale attack on a settlement — attackers try to destroy it, defenders try to hold it. Turret Drop cheaper and upgrades his static weapons, and his tier 4 Mech Overcharge makes all his mechs invulnerable and faster for a short burst. His tier 5 Digging in Deep makes core base tech and barricade pieces free. Johnson is the turtle: bunker up, overcharge mechs to win a fight, then convert the saved resources into a free-tech base.
Colonel Kinsano is the fire-rush leader. Heat of Battle grants a kill-triggered self-buff, Hellcharge buffs her army and detonates a blast when buffed units die, and her tier 5 Inferno is an orbital fire strike that leaves an expanding burn field. Her Flame Warthog Drop and Firestorm Battle Group give aggressive reinforcement. Kinsano wants early pressure: Helldrop Flame Marines, Napalm Missiles onto resource points, and a Firestorm finisher.
Serina is the cryo-control leader. Cryogenic Generator mines apply chill, Ice Barrier walls chill and detonate, and Frostravens provide flying cryo support. Her tier 5 Glacial Storm is a huge expanding cryo zone. Serina wins by stacking chill and cashing it out with Seismic Blast’s Shatter effect. She is the strongest setup leader: slow enemies, freeze them, then convert the freeze into burst damage.
Banished leaders
Atriox is the fortification leader. His Fortifications passive cheapens bases, structures, turrets, and barricades, and Countermeasures turns Jump Brutes into mine-dropping bomb-line leapers. Dying Breath grants a death-save to marked units, and Unbreakable (tier 5) makes his whole army invulnerable for seven seconds. Atriox is the Banished turtle: build cheap, survive with Dying Breath, then Unbreakable to win an all-in.
The Arbiter is the rage-caster. Conduit of Rage triggers a buff pulse every time he casts a leader power, scaling with tier. Stasis and Mass Stasis lock enemy units in bubbles, and Mass Cloaking (tier 5) cloaks his whole army with speed and life leech. Arbiter wants frequent small casts to keep Conduit of Rage live, then a Mass Stasis setup into a cloaked collapse.
Colony is the Lekgolo-support leader. Skitterers attach to friendly units as support drones, Engineer Swarm repairs allies, and Vehicle Symbiotes give nearby vehicles damage reduction, sight, and range. Combat Repair (tier 5) gives all his units passive regeneration. Colony is the force multiplier for a mech-heavy teammate in team games.
Decimus is the lifesteal-rage leader. Killing Frenzy grants kill-triggered damage, Siphon grants timed life leech, and Boundless Siphon (tier 4) gives permanent lifesteal by target bucket. Boundless Fury (tier 5) gives a permanent damage and speed bump. Decimus wants a durable army that sustains through fights.
Shipmaster is the mobility leader. Banished Raid speeds capture, Teleport blinks his army, and Extraction pulls and redeploys with a heal on arrival. Tactical Gateway (tier 5) deploys reusable Slipstream Rift gateways for 120 seconds. Shipmaster is the master of rotation — pick fights, extract, and reposition faster than the opponent can respond.
Pavium is the artillery-turtle leader. Mega Turret is a socket-build long-range artillery turret, Burnout overcharges structures, and Pavium’s Stand (tier 5) grants brief invulnerability to buildings, turrets, and mines. Pavium controls ground with turrets and mines and refuses to lose his base.
Voridus is the corruption leader. Infused Mines and Infusion Wake leave lingering corruption fields, and Cataclysm (tier 5) ignites his own corruption into a detonating field. Voridus wants to lay corruption, then cash it out.
YapYap is the Grunt-support leader. Methane Wagon buffs allied Grunts and debuffs enemies, Surprise Party mines spawn Grunt Swarms, and Methane Party (tier 5) blankets the area with methane fields. YapYap is the team-support Grunt enabler.
Tier summary and build-order guidance
Based on the power curves above, leaders cluster into three groups. Early-spike leaders (Kinsano, Forge, Shipmaster) want fast aggression and a tier-3 timing push — build one expansion, rush the key tech building, and hit with the signature drop or strike. Setup leaders (Serina, Atriox, Voridus) want a slower game where they layer their mines, cryo, or corruption and cash out with a tier-5 finisher — defend with tier-1-2 utility, then convert the setup into burst. Sustain leaders (Cutter, Colony, Decimus, Johnson) want a long game where veterancy, lifesteal, or regeneration compounds — expand steadily, keep the army alive, and let the passive scaling win.
For 1v1, early-spike leaders tend to dictate the pace because they punish the slower setup openings before their tier-5 tools come online. For team games, sustain and support leaders (Colony, YapYap, Decimus) shine because a teammate can supply the aggression while they multiply its effectiveness — Colony’s Skitterers and Engineer Swarm, or YapYap’s Methane buffs, turn an allied push into a rout.