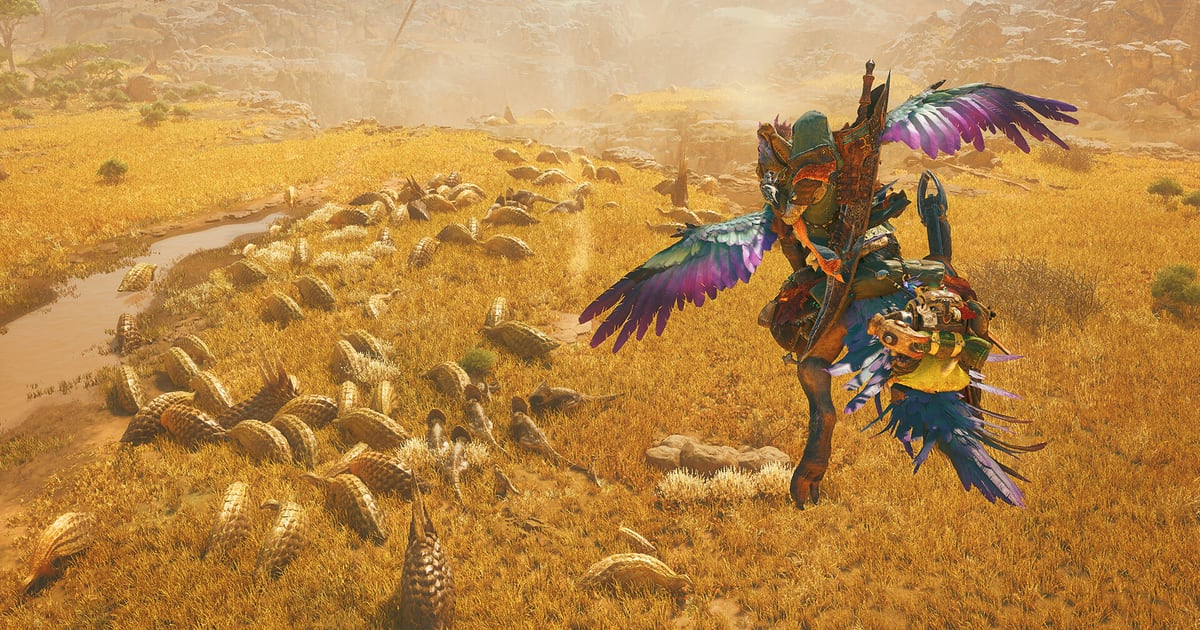
The Seikret mount in Monster Hunter Wilds is far more than a simple taxi to traverse the vast dunes of the Windward Plains. It represents a paradigm shift in hunt preparation by unlocking the Secondary Weapon Sling. In all previous Monster Hunter titles, departing on a quest locked you into a single weapon class. In Wilds, hunters carry two fully customized weapons on their Seikret’s saddle, enabling dynamic weapon swapping mid-combat without returning to camp.
What this covers: Seikret auto-navigation vs manual steering, Secondary Weapon loadout pairings, mounted item use (Sharpening/Potions), and jumping dismount attacks. Why it matters: Carrying complementary weapon archetypes (e.g. blunt status opener + slicing tail-cutter) doubles hunting efficiency against apex monsters. Who should pick this: Hunters optimizing quest times across multi-monster ecosystems.
The Seikret Mount Utility Suite
Calling your Seikret (via the D-pad macro) summons your companion immediately, scooping up the hunter even while staggering from monster attacks:
| Mounted Action | Execution Method | Tactical Advantage |
|---|---|---|
| Weapon Swapping | Press Right D-pad (X key on PC) while mounted | Draws the holstered secondary weapon in one button press; if you are on foot, the same press calls the Seikret and mounts you first |
| Mounted Whetstone Sharpening | Use Whetstone from item bar while sprinting | Restores maximum weapon sharpness at full sprint speed safely |
| Mounted Potion Consumption | Drink Mega Potion / Ration while riding | Heals full HP without exposing hunter to monster charge vectors |
| Leaping Dismount Attack | Press Attack button while sprinting on Seikret | Launches hunter high into the air for immediate mounting damage |
| Supply Pouch Access | Press Left D-pad while riding | Opens the Seikret Pouch that the Guild stocks with supply items each quest |
| Hook Slinger Gather | Aim the Slinger, then fire | Pulls out-of-reach materials and triggers environmental objects from the saddle |
| Mid-Air Glide | Jump off a cliff, then hold R2/RT (Z key on PC) | Descends safely, and weapon swapping stays available during the glide |
| Drift Brake | Hold R2/RT (Z key on PC) at full speed, then steer | Cuts sharp corners and yields a burst of speed on release |
| Auto-Move Toggle | Press Up D-pad while mounted | Hands-free travel that follows the Scoutfly trail to your objective |
| Automatic Evasion | Passive while riding | The Seikret evades some monster attacks for you without an input |
The mount is a combat platform, not just transport. Capcom’s official hunting page describes the Seikret as stashing an extra weapon in its weapon sling so hunters can switch between two weapons of their choice, and notes that while mounted the Seikret “will also evade some monster attacks automatically.” That evasion is the reason the utility table is worth memorising: a hunter who keeps one eye on the mount can sharpen, heal, or swap inside the window an attack would otherwise have punished.
How the Weapon Swap Actually Works
The swap is a single button press, not a menu selection. Press Right on the D-pad — the X key on keyboard and mouse — and your hunter draws the weapon holstered in the Seikret’s sling. If you are already riding, the exchange is immediate; if you are on the ground, the same press first calls the Seikret, mounts you, and only then swaps, per Polygon and Push Square.
Two control caveats matter in practice. First, you cannot swap while dismounting from the Seikret, and GameWith notes “there is a slight delay before switching weapons; if you dismount too early, the switch will not occur.” Second, some missions keep the Seikret at base camp, which removes field swapping entirely for that hunt’s duration (Destructoid).
Your two weapons are chosen in a tent or pop-up camp under Equipment Menu → Change Equipment. The primary is the weapon you begin the hunt holding; the secondary rides the mount. You can also carry two of the same weapon type — Game8’s example is two Great Swords with different attributes — and both bowguns can be fired from the Seikret’s back, which makes them unusually flexible in the secondary slot. What you cannot do is pull an arbitrary weapon from your collection mid-hunt: changing which two weapons you carry means fast-travelling to a camp and entering the tent.
Optimal Dual-Weapon Pairing Strategies
Because hunters can carry two distinct weapon types, loadouts should be designed around complementary tactical roles rather than redundant weapons:
1. The Hammer + Great Sword Combo (KO to Sever)
- Primary (Hammer): Focus on blunt strikes to the monster’s head, building stun damage and breaking horns.
- Secondary (Great Sword): Once the monster collapses in a KO knockdown state, mount the Seikret, switch to the Great Sword, and unleash a fully charged True Charged Slash directly onto the tail to sever rare carve materials.
2. The Heavy Bowgun + Dual Blades Combo (Status to Shred)
- Primary (Heavy Bowgun): Open the engagement from long range, applying Sleep and Paralysis ammo coatings while the monster is alert.
- Secondary (Dual Blades): The instant the monster falls paralyzed, switch to Dual Blades, activate Demon Mode, and unleash high-cadence Blade Dances into vulnerable wound hitzones.
What to Pair in the Secondary Slot
Pairing is the entire point of the two-weapon system, and Game8 maintains a per-weapon recommendation table that maps a sensible secondary to each of the fourteen weapon families:
| Primary Weapon | Recommended Secondary | Why it works |
|---|---|---|
| Hammer | Hunting Horn | Two blunt weapons raise Knock Out chances, especially with a maximum-level Slugger skill |
| Great Sword | Hammer | The Hammer’s stun creates the opening for a True Charge Attack, and the pair covers both Blunt and Sever |
| Bow | Dual Blades | The two cover each other’s range gap and deal with aerial monsters |
| Light Bowgun | Dual Blades | Both deliver a high rate of attacks, suiting a status-and-element offensive-support playstyle |
| Heavy Bowgun | Light Bowgun | A wider ammo selection, with the Light Bowgun as supporting fire for the Heavy’s damage |
| Insect Glaive | Heavy Bowgun | Aerial agility plus high-damage ranged attacks |
| Charge Blade | Lance | Since the Charge Blade relies on Perfect Blocks to activate Savage Axe, a second Guard weapon lets you counter faster |
| Switch Axe | Charge Blade | Rapid Morph on both weapons lets them reach maximum damage at a quicker pace |
| Long Sword | Sword and Shield | Quick item use and support potential complement a counter-heavy playstyle |
| Lance | Gunlance | The Lance offers stronger defence while the Gunlance adds firepower |
| Sword and Shield | Insect Glaive | The Insect Glaive fixes the Sword and Shield’s limited reach with aerial mobility |
| Gunlance | Charge Blade | Both excel at close range, and their attack modes sustain pressure on the target |
| Hunting Horn | Long Sword | The Horn buffs the Long Sword and is especially valuable with Power Prolonger |
| Dual Blades | Insect Glaive | A fluid, speedy pair that covers the Dual Blades’ reach limit with aerial attacks |
Choosing by Damage Type and Armor Skill
Three lenses settle most pairings. The first is damage type: Great Sword (Sever) plus Hammer (Blunt) lets you knock a monster out and cut its tail in the same hunt. The second is armour-skill overlap — pairing Dual Blades with Sword and Shield lets one build service Burst, Antivirus, and Coalescence at once, instead of splitting your decorations across incompatible weapons. The third is element coverage: two copies of the same weapon type with different attributes, such as a fire and a water Dual Blades, let you hit two of a monster’s weaknesses with one loadout.
Bowguns are the universal answer. Either the Light or Heavy Bowgun works with any primary weapon, and both can be fired while riding the Seikret, which extends their reach and safety. In multiplayer groups a bowgun also doubles as support: Demon Ammo raises the party’s raw damage and Armor Ammo raises defence, so a bowgun in the secondary slot can carry a role that no melee pairing can.
Auto-Navigation vs Manual Terrain Steering
While riding the Seikret, releasing the movement stick activates Auto-Navigation, allowing your mount to automatically track the scoutflies toward the target monster. Use this hands-free window to sharpen weapons, craft extra ammunition, and inspect the endemic life map. When navigating narrow cliffs or dodging monster sand-traps, take manual control with the analog stick for precise platforming.
The toggle is explicit: press Up on the D-pad while mounted to switch Auto-Move on, and Down on the D-pad (or the Q key on PC) to take back manual control. Veering deliberately off-course also disengages it. If you stop moving for a while, Game8 notes the Seikret will return to Auto-Move by itself and resume heading for the map marker, so a hunter who pauses to craft ammunition does not have to re-press anything.
Fextralife documents two manual schemes under Options → Controls → Seikret Manual Controls. Type 1 behaves like Auto-move, where speed is managed with the bumper buttons and holding the brake brings the mount to a full stop; Type 2 behaves like hunter controls, where the Seikret only moves while you hold a direction and stops on its own. Type 2 is the recommended setting for players who find the default automatic movement difficult to steer precisely.
One movement quirk is worth knowing before a fight: aiming a ranged weapon in Focus Mode slows the Seikret so you can steady the shot, but aiming the Slinger does not. Read the monster’s posture before committing to a mounted volley, or the slow-down will cost you the repositioning you wanted.
Seikret Specializations and Customization
Fextralife lists three Seikret specializations that shape what the mount does under pressure: Transport (getting you to objectives), Cavalry (using weapons and items while mounted for speed and agility), and Fight (escape support when a dangerous monster presses the engagement). They are support behaviours rather than stat buffs — the Seikret never attacks — but they change how forgiving a mounted rotation feels.
Cosmetics are separate from those behaviours. You unlock appearance customization by speaking to Nona at the Windward Plains Base Camp during the “Pursuit of Solitude” main mission, after which the options appear under the Appearance Menu in any camp. You can change body and plumage colour, pattern thickness and transparency, eye colour (left and right separately), adornments, a pouch pendant, and the Seikret’s name. Every one of these is appearance-only; Fextralife is explicit that it “does not add any buffs to its performance, nor will it affect your gameplay in travelling or in combat.”
Patch Context: Seikret Response and Item-Use Fixes
Capcom’s Title Update 2 (Ver. 1.020.00.00, June 30, 2025) rewrote several Seikret interactions that this guide’s routine depends on. The patch improved the speed of response when calling the Seikret and the response speed for controlling it after mounting from a call; it fixed an issue where an auto-moving Seikret would circle the area if you arrived before the large monster; and it made item use inputs while mounted more responsive after switching weapons, after closing the map, and immediately after using another item. It also added the ability to dismount while drifting.
That list matters for the swap-and-heal pattern: “item use after switching weapons” was specifically a lag point before the patch, so a hunter who internalised the old timing may find the current version noticeably faster. The circling fix also makes Auto-Move a safer way to close on a fleeing monster without overshooting.