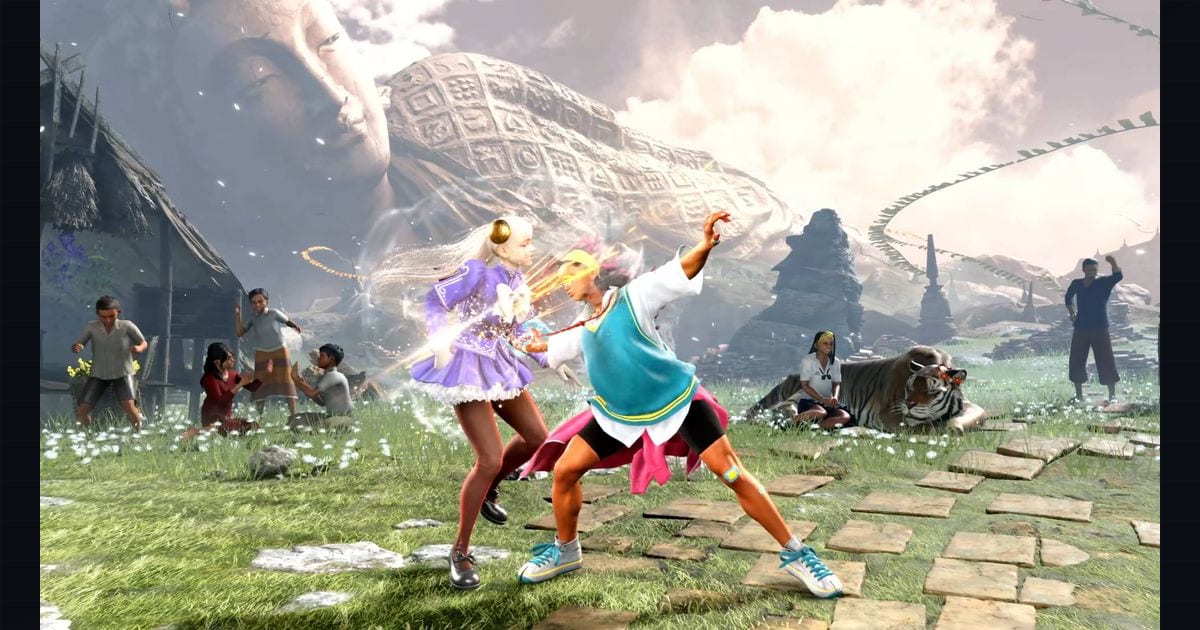
Street Fighter 6 launched with 18 characters and has expanded through multiple DLC seasons, giving new players one of the widest archetype spreads in modern fighting games. The problem isn’t a lack of options — it’s picking a main that actually fits how you want to play instead of chasing tier lists that shift every patch. This guide maps the roster’s core archetypes to concrete gameplans, flags execution difficulty honestly, and points first-time players at characters that teach fundamentals without punishing every dropped input.
What it covers: The SF6 roster mapped to archetypes, concrete gameplans, and honest execution difficulty. Why it matters: A main that fits how you want to play beats chasing tier lists that shift every patch. Who should pick this: New players standing at character select.
The four questions to ask before you pick
Before touching a character select screen, answer these honestly — they matter more than any matchup chart.
- Do you want to control space or close distance? Zoners (Guile, JP, Dhalsim) want opponents at the end of a fireball. Rushdown characters (Cammy, Kimberly, Juri) want to be inside your guard. Footsies characters (Chun-Li, Dee Jay) want to fight at mid-range where normals decide rounds.
- What’s your tolerance for charge inputs? Charge characters hold a direction for about 45 frames (roughly 3/4 of a second) before a release motion, with the exact charge time varying slightly per move. It changes how you walk, block, and pressure. If holding back for a Sonic Boom feels alien, skip the charge roster.
- How much execution do you want? Shotos have simple quarter-circle motions. Stance and resource characters (Jamie, Juri, Kimberly) layer extra systems on top of fundamentals.
- Do you want a grappler’s payoff? Command grabs delete 25–40% of a life bar on a correct read. The cost is slow movement and a punishing neutral if you guess wrong.
Character archetype map
The table below groups the launch-and-DLC roster by primary archetype, with an honest execution rating and one-line gameplan. Execution is graded on a 1–5 scale where 1 is “Modern controls only, honestly” and 5 is “lab-or-die.”
| Character | Archetype | Execution | Gameplan summary |
|---|---|---|---|
| Ryu | All-rounder (shoto) | 2 | Fireball + anti-air + balanced normals; the fundamentals teacher |
| Luke | All-rounder | 2 | Aggressive shoto with strong pressure; Capcom’s recommended beginner pick |
| Ken | Rushdown shoto | 3 | Run-stop pressure and OD mixes; higher tempo than Ryu |
| Guile | Charge zoner | 3 | Sonic Boom wall + Flash Kick anti-air; the keepaway benchmark |
| Blanka | Charge trickster | 3 | Mix-ups, ball roll, electricity; bait-heavy |
| Dhalsim | Zoner | 4 | Limb pokes, teleport escapes, fire; spacing-dependent |
| E. Honda | Grappler / rush | 3 | Headbutt and sumo pressure, command grabs |
| Chun-Li | Footsies / charge hybrid | 4 | Long pokes, lightning legs, stance cancels; high ceiling |
| Zangief | Pure grappler | 3 | SPD threat, slow walk, reads-based |
| Manon | Grappler hybrid | 3 | Medal-stacking command grabs, decent normals |
| Marisa | Heavy hitter / stance | 2 | Big single hits, armored stances; slow but forgiving |
| Cammy | Rushdown | 2 | Divekick pressure, fast walk, honest mix |
| Kimberly | Rushdown / setup | 4 | Run cancels, spray setups, high mobility |
| Juri | Rushdown / resource | 4 | Fuha stocks fuel extended combos |
| Dee Jay | Charge / footsies hybrid | 3 | Slides, good pokes, stance feints |
| Lily | Windclad grappler | 3 | Stock-powered command grabs and buffs; small body |
| JP | Zoner / setup | 4 | Ghost traps and purple fireballs; oppressive when set up |
| A.K.I. | Setup / poison | 4 | Poison pools and self-buff cancels; combo-heavy |
DLC additions (Rashid, Ed, Akuma, M. Bison, Terry, Mai, Elena) generally slot into existing archetypes — Rashid and Ed are mobility rushdown, Akuma is a high-damage shoto, Bison is a charge zoner with teleport pressure, Terry and Mai are mid-range hybrids, and Elena is a heal/stance footsies character.
The archetypes, explained
All-rounder / Shoto — learn the whole game
Ryu and Luke are the textbook answer to “what should I start with.” They have a fireball for zoning, a DP (shoryuken) for anti-air, and balanced walk speed that doesn’t force you into a single range. Ryu teaches neutral; Luke teaches modern pressure. If you’re new, pick one of these two and stay until you can anti-air on reaction and confirm a hit into a special — those skills transfer to every other character.
Zoner — make them come to you
Guile is the cleanest entry point: two specials (Sonic Boom, Flash Kick) and a gameplan built around holding down-back. The skill floor is reading jumps and punishing dashes. Dhalsim and JP trade Guile’s simplicity for longer limbs and trickier setups — JP in particular layers ghost-trap projectiles that demand both player and opponent track multiple objects on screen. Zoners punish impatient opponents but collapse if you let them get cornered.
Rushdown — close the gap and stay there
Cammy is the honest rushdown pick: fast walk, divekick, and a spin knuckle that sidesteps projectiles. Nothing she does is gimmicky, which makes her a strong second character after a shoto. Kimberly and Juri push the archetype into setup territory — Kimberly’s run cancels and spray installations create ambiguous okizeme, while Juri’s Fuha stocks gate her best combos behind resource management. Both reward lab time; both punish players who skip it.
Grappler — the read game
Zangief is the pure grappler: one SPD changes a round. Manon is the modern alternative — she stacks “medal” levels by landing command grabs, scaling her damage across the match. E. Honda and Lily sit closer to grappler-adjacent: Honda leans on sumo pressure, Lily uses windclad stocks to buff grabs and specials. Grapplers live and die on reads; if you don’t enjoy committing to hard guesses, the archetype will frustrate you.
Footsies / mid-range — normals as the gameplan
Chun-Li and Dee Jay want to fight at the range where a well-spaced poke hits and a whiffed one gets punished. Chun-Li’s ceiling is high because stance cancels and charge mechanics stack; Dee Jay is more accessible, with slides and feints that fake pressure. These characters reward players who like spacing over mix.
Beginner-friendly picks, ranked
These five minimize execution while still teaching transferable fundamentals.
- Luke — Aggressive shoto with simple inputs, strong Drive Rush pressure, and a combo structure that scales into intermediate play. Capcom has explicitly pointed new players at Luke; he’s the closest thing SF6 has to a default main.
- Ryu — If you’d rather learn neutral than pressure, Ryu is the fundamentals teacher. His kit is intentionally honest, so your wins come from spacing and anti-airs, not gimmicks.
- Marisa — Slow walk speed and big single hits make Marisa forgiving for players still learning motion inputs. Her armored stance absorbs a hit and retaliates, teaching the timing around Drive Impact trades.
- Cammy — The honest rushdown pick. Few resources to track, fast and direct gameplan, and her specials don’t demand charge. Good for players who already know they want to pressure.
- Manon — The most accessible grappler. Her normals are serviceable, and the medal system gives you a visible reward for landing command grabs — useful feedback when you’re learning the read game.
A note on Modern controls: SF6 ships Classic, Modern, and Dynamic input modes. Modern removes most motion inputs and adds one-button specials at reduced damage, which is genuinely useful for learning matchups and gameplans before you tackle execution. Competitive play overwhelmingly uses Classic, but Modern is a legitimate on-ramp, not a handicap mode.
The Drive system and your main
Your archetype choice interacts with the Drive gauge, SF6’s universal meter that powers Drive Impact, Drive Parry, Drive Rush, Drive Reversal, and Overdrive specials.
- Zoners lean on Drive Impact to absorb jumps and reset spacing.
- Rushdown characters burn Drive Rush to convert a poke into full pressure.
- Grapplers use Drive Rush to close the gap into command-grab range.
- All-rounders flex all four options depending on the matchup.
If your instinct is to spend meter aggressively, rushdown fits. If you’d rather hold it for reactive defense, zoners and footsies characters spend more conservatively.
A process for actually deciding
- Pick one character from the beginner list above and play them for two weeks.
- Learn one BnB (bread-and-butter) combo, one anti-air, and one Drive Rush confirm.
- Play 50 ranked matches. If you’re frustrated by execution, switch to a lower-execution pick. If you’re bored by the gameplan, switch archetype, not character within the same archetype.
- Only consider a higher-execution main once you can consistently anti-air and confirm hits. Execution problems compound with archetype complexity — don’t stack them.
The strongest mains are the ones that match how you naturally want to play. A rushdown player grinding Guile will quit before they get good; a zoner forcing Cammy will feel lost every match. Pick the archetype first, then the character — not the reverse.
Sources & further reading
- Official Street Fighter 6 site — character roster and mechanics overview: https://www.streetfighter.com/6/
- Street Fighter 6 on Steam (store page, system requirements): https://store.steampowered.com/app/1985810/Street_Fighter_6/
- Capcom official patch notes and DLC announcements: https://www.streetfighter.com/6/
- SuperCombo wiki — Street Fighter 6 frame data and character pages: https://wiki.supercombo.gg/w/Street_Fighter_6
- Mizuumi wiki — fighting game community reference for niche versus titles: https://mizuumi.wiki/w/Main_Page
- EventHubs — character usage stats and tier data: https://www.eventhubs.com/tiers/sf6/
Next read
- For the meter your main will manage, see Street Fighter 6: Drive Rush, Drive Impact, and Punish Frame Data.
- For the newest archetype on the roster, see Street Fighter 6: Yasmine Eskrima and Bayani Mode Primer.
- All our coverage lives on the Street Fighter 6 hub.