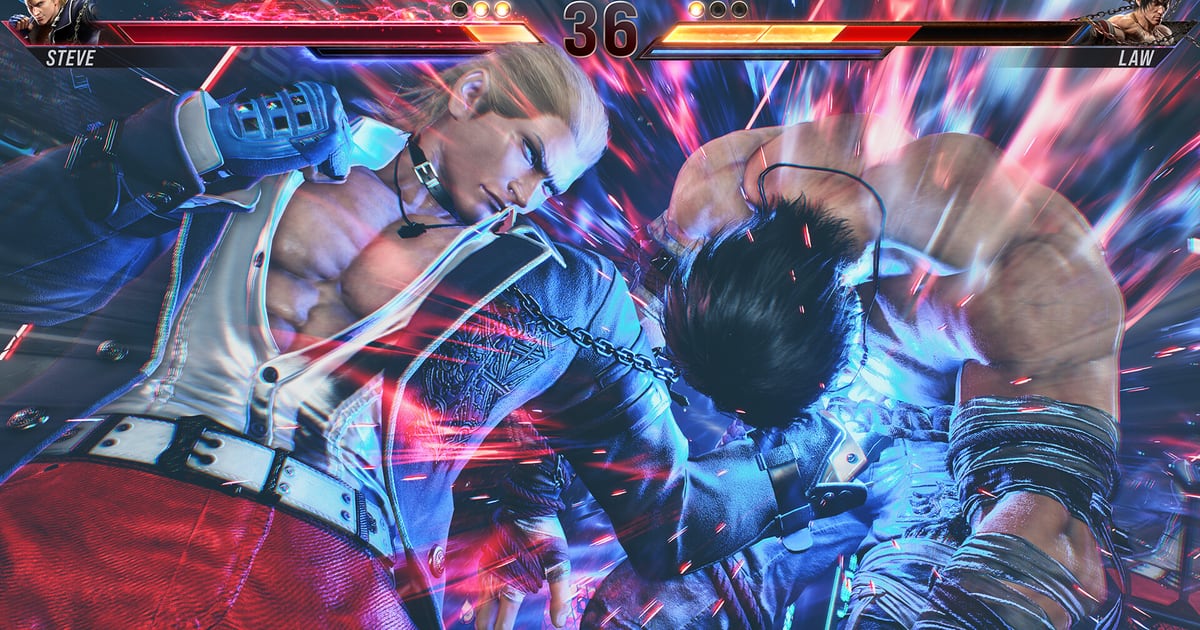
Bandai Namco designed Tekken 8 around the core ethos of “Aggressiveness.” Replacing the static defense and backdash-heavy spacing of Tekken 7, the game introduces the Heat System—a round-based power-up state that unlocks chip damage on block, enhanced character movesets, dynamic Heat Dashes, and cinematic Heat Smash super attacks.
What this covers: Heat Activation vectors, Heat Engagers vs Raw Heat Burst, Heat Dash frame advantage (+5 on block), chip damage mechanics, and Heat Smash finishers. Why it matters: Activating Heat properly guarantees dominant mixup situations and wallsplat combo extensions that deal upwards of 75+ damage. Who should pick this: Fighters transitioning into red and purple ranks who want to optimize round momentum.
Heat Activation Vectors: Burst vs Engager
Every player begins each round with a full Heat Gauge (lasting roughly 10 to 15 seconds once ignited). You can activate Heat via two primary methods:
| Activation Type | Input | Heat Timer Granted | Hit Properties | Strategic Advantage |
|---|---|---|---|---|
| Heat Burst | 2+3 (or single Heat macro) | ~10 Seconds (Partial Bar) | Universal jumping slam, armor frames on startup | Excellent defensive panic button, combo filler for aerial extensions |
| Heat Engager | Character-specific key moves (e.g. Jin 1+2, Kazuya f,F+2) | 15 Seconds (Full Bar) | Powerful strike that forces forward sprint on hit | Grants +9 frame advantage on hit, sets up 50/50 mixups instantly |
Entering Heat via an Engager is strictly superior to raw Heat Burst because it preserves the entire Heat timer and automatically closes distance, leaving the opponent reeling.
Heat Gauge Economy: The 900-Frame Clock
Every Heat bar holds exactly 900 frames — 15 seconds at 60 FPSframerate. How many images (frames) the game shows per second; higher = smoother motion. 60 fps is a common target. — and it drains continuously from the moment it ignites. The bar does not only tick down on a timer: it also erodes every time you connect. Per the Wavu Wiki’s Heat notes, the gauge drops 2 frames for every 1 HP of damage you deal on hit, and 1 frame for every 2 points of damage a move would deal on hit when that move is blocked. That produces a counter-intuitive squeeze: connecting Kazuya’s 20-damage f,F+2 on block costs the attacker 10 frames of their own bar, while a 5-damage jab on block costs only 2 frames. Once the bar reaches zero it is gone for the rest of the round, which is why preserving it matters as much as spending it.
| Heat Action | Gauge Cost | Practical Consequence |
|---|---|---|
| Heat Engager activation | None (grants the full 900F bar) | Best value — the entire timer is preserved |
| Heat Burst activation | 300F on ignition | Leaves roughly 10 seconds of Heat to spend |
| Heat Smash | Entire remaining bar | Cash-out finisher, cannot be undone |
| Heat Dash | Entire remaining bar | Combo and wallsplat extension trade |
| Heat-only move | Variable per move | Enhanced attacks and installs cost chunks |
| Dealing damage | −2F per 1 HP on hit | Long combos shorten your own Heat |
| Getting blocked | −1F per 2 dmg on block | Chip pressure also costs the attacker |
Heat Burst Frame Data and Guarantees
Every character’s Heat Burst looks different, but the engine-level numbers are shared. It is a 16-frame universal mid (i16) with powercrush frames 7 through 16, landing at +1 on block and +2 on counter hit, with a total of 92 frames and 30 frames of recovery. The input is only 2+3 or the dedicated Heat macro, which makes it a panic button: you armor through an opponent’s poke and reset the situation. Two properties keep it honest — it deals only recoverable damage and cannot cause a K.O., and it hands back just 3 points of recoverable health on hit or block. Ignition also consumes 300 frames of the bar, so a Heat Burst start leaves a shorter window than an Engager start. Season 2 added the option to trigger Heat Bursts directly out of most stances, with Back Turned as the notable exception.
The Engager Bonus: 30 HP and a Crouch Option
A Heat Engager gives you more than a full bar. Per Wavu’s notes, landing one recovers a minimum of 30 HP of your own recoverable health on top of whatever the move itself regenerates, so an Engager doubles as a burst heal during a long round. Engagers can also wallsplat and balcony break when the move carries those properties, which is what turns a mid-screen poke into a wall-carry launcher. Season 2 added one more layer: the attacker can choose to enter crouch during the Engager animation, opening crouch-only follow-ups before the opponent has fully recovered.
The Power of the Heat Dash
While inside Heat state, executing any Heat Engager move and immediately holding Forward triggers a Heat Dash. This consumes your remaining Heat timer but delivers staggering advantages:
- On Hit: Launches the opponent for an airborne juggle or wallsplat, converting single-hit poke moves into devastating 70+ damage combos.
- On Block: Leaves you at +5 frames on block right in the opponent’s face. Because the fastest generic jab in Tekken is 10 frames, pressing any mid attack faster than 15 frames creates an unbreakable frame trap that crushes the opponent if they attempt to press buttons.
A completed Heat Dash also returns 6 points of recoverable life on hit and 3 points on block. The one exception is a throw that doubles as a Heat Engager — those cannot be cancelled into a Heat Dash, so a throw-based character’s Engager pressure stops at the throw itself.
Heat-Exclusive Move Properties
Heat does more than add chip damage. When you activate, several characters gain brand-new moves or enhanced versions of existing ones, and those Heat-only options consume the gauge at different rates. Wavu’s mechanics list gives the clearest examples: full hold-charge moves speed up (Kuma), stances gain autoparry (Reina), just-frame moves lose their strict timing requirement (Lee), a character gains an extra stance transition (Azucena), and installs can be paid for with Heat instead of their normal resource (Claudio). Treat these as the real payoff of an activation — a Heat bar spent purely on blocked chip is a wasted activation when it could unlock a genuinely new option.
Chip Damage and Recoverable Health
In Tekken 8, heavy attacks executed during Heat inflict substantial Chip Damage even when fully blocked. This chip damage manifests as gray recoverable health on the defender’s life bar.
- If the defender stays passive, their life total steadily bleeds away.
- The defender restores gray recoverable health two ways: landing their own offensive strikes, or forcing the attacker to block.
- Therefore, entering Heat forces the opponent into uncomfortable panic swings, allowing you to sidestep or parry for full launcher punishes.
The conversion rules cut both ways. While you are standing or crouching during Heat, 30% of any damage you take is converted into recoverable health and your gauge depletes slightly; while you are airborne after a launch, incoming attacks inflict only recoverable damage and drain the bar a little. That makes a Heat user hardest to kill mid-juggle, and it means the defender’s cleanest counterplay is often to stay grounded, block, and force the attacker to burn the bar on blocked chip rather than clean hits.
Reading Season 1 Advice in Older Guides
One trap for returning players: many older Heat write-ups quote a Heat Engager advantage of +17 on hit. That was the Season 1 figure, and it also described a forced guard state on the opponent. Since Season 2, Engagers are +9 on hit instead. Season 2 also let the attacker enter crouch during the Engager animation and extended stance activation to both Heat Bursts and Heat Smashes. If a video or guide promises +17, it is pre-Season 2 data.
When to Cash Out: The Heat Smash
The Heat Smash is your ultimate finisher while in Heat. Executed with the Heat button, it unleashes a high-damage cinematic sequence that exhausts all remaining Heat meter:
- Low-starting Heat Smashers (like Paul) threaten with a low opening, but all low Heat Smashes are unsafe and punishable on block.
- High/Mid-heat smashers deal massive damage, wall carry, and leave you at positive frames even if blocked. Cash out your Heat Smash near the wall or at the conclusion of an extended juggle combo to close out tight rounds.
Heat Smash Frame Data Roundup
Heat Smashes vary enormously in speed and safety, so knowing a character’s startup and on-block frames is how you decide whether to respect or punish one. The table below samples the Wavu Wiki Heat Smash frame data; the full roster ranges from Jack-8’s 10-frame smash to Reina’s 21-frame version.
| Character | Startup | Hit Level | On Block | Notable Property |
|---|---|---|---|---|
| Jack-8 | i10 | H,M,M | −9 | Fastest sampled smash; balcony break |
| Zafina | i12 | H, SM | +3 | Balcony break |
| Law | i14 | Mid | +11 | DSS stance, forced |
| Dragunov | i15 | M,M,M | +6 | Balcony break |
| Jin | i15 | M,H,M | +3 | Full crouch transition, choice |
| Bryan | i16 | All Mid | +15g | Floor break |
| King | i17 | M,M | +12g | Floor break |
| Hwoarang | i17 | M,M,H | +11g | RFS stance, forced |
| Paul | i18 | L,M,M | −12 | Low opening — unsafe on block |
| Kazuya | i18 | L,M,M,M | −14 | Low opening — unsafe on block |
| Reina | i21 | M,M | +8 | Slowest sampled smash |
Because a Heat Smash consumes your entire remaining bar, avoid firing one mid-juggle: the game scales Heat Smash damage down heavily inside a combo, and a Heat Dash almost always converts more total damage for the same gauge. Reserve the Smash for a round-ending wall splat, for instantly activating an undamaged hard wall or hard floor, or for a read where the on-block plus frames end the opponent’s turn outright.