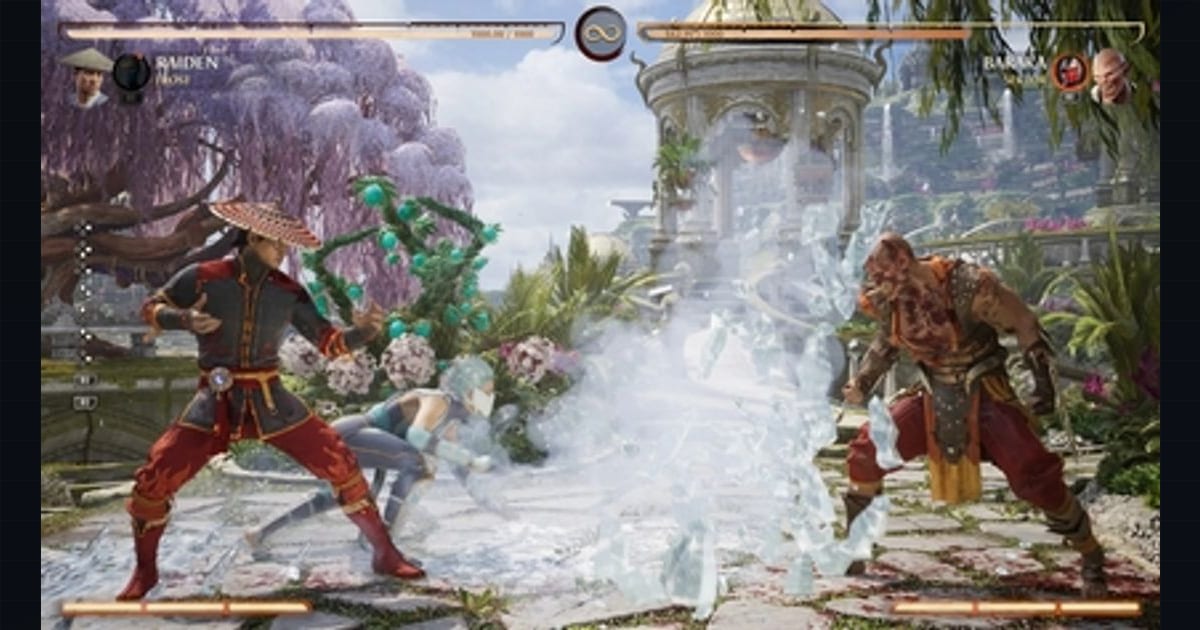
Mortal Kombat 1 — Kameo Assist System & Timing Mechanics Guide
Mortal Kombat 1’s defining mechanical departure from prior entries is the Kameo assist system. Instead of the variation mechanics of MKX or the custom moveset loadouts of MK11, NetherRealm introduced a two-character roster: your main fighter plus a separate Kameo fighter you summon mid-match for extensions, pressure, anti-air, and combo damage. The system is the single largest variable in neutral, punish, and combo optimization — and it is also the most-patched mechanic in the game’s lifespan.
This guide covers how Kameo assists work, their cooldown and call timing, and which Kameo fighters pair best with which roster characters.
What it covers: How Kameo assists work — cooldowns, call timing, and the best Kameo-to-roster pairings. Why it matters: The Kameo system is the largest variable in neutral, punish, and combo optimization — and the most-patched mechanic in MK1. Who should pick this: MK1 players optimizing extensions, pressure, and anti-air calls.
How the Kameo System Works
The Two-Roster Selection
At the character select screen you pick two fighters:
- Main roster fighter — the character you control directly, with full moveset, fatal blow, and fatalities.
- Kameo fighter — an assist-only character drawn from a separate roster (including legacy names like Stryker, Goro, Motaro, and Khameleon alongside returning staples). The Kameo cannot be KO’d and does not have a health bar. It is summoned on input.
The Kameo roster is mechanically distinct from the main roster. A character can appear on both lists (e.g., Scorpion exists as a main fighter and a Kameo), but the Kameo version has a curated subset of assist calls, not the full moveset.
Kameo Inputs
Kameo calls are bound to a dedicated input — by default the R1/RB/R shoulder button on controller (R1 on PlayStation 5, RB on Xbox Series X|S, R on Nintendo Switch) — with directional modifiers producing different assist variants:
- Neutral Kameo (
Kameowith no direction): typically a forward-advancing or mid-screen assist. - Back Kameo (
Back + Kameo): usually a defensive, anti-air, or spacing tool. - Forward Kameo (
Forward + Kameo): a forward-moving or combo-extension assist. - Down Kameo (
Down + Kameo): often a low or launcher variant.
Each Kameo fighter has 3–4 distinct assist calls mapped across these inputs, and each call has its own startup, active, recovery, and cooldown values.
Cooldown & Frame Timing
The Cooldown Meter
Every Kameo call consumes a cooldown resource. After a call, that specific Kameo assist enters a cooldown window during which it (and often the entire Kameo system) is unavailable. The cooldown is displayed as a visual ring or icon around the Kameo portrait on the HUD.
Key points about the cooldown model:
- Per-call cooldowns — different assists on the same Kameo can have different cooldown durations. A low-startup anti-air may recycle faster than a launcher.
- System lockout — after most calls there is a brief global lockout preventing assist spam, even if a specific call’s meter would allow re-use. The exact lockout window has varied across patches.
- No meter cost — Kameo calls do not cost offensive or defensive meter. They are a separate resource. This is what makes them so impactful: a Kameo extension can convert a meterless punish into 30–40% damage.
Approximate Frame Data
Exact frame data has shifted across patches. The following are order-of-magnitude values for planning — treat specific numbers as approximate and cross-check them against current patch frame data tools (such as the in-game move list or community frame-data spreadsheets):
| Assist type | Typical startup | Typical cooldown | Typical use |
|---|---|---|---|
| Fast anti-air | ~10–15 frames | ~3–4 seconds | Blow up jumps, interrupt air approach |
| Launcher / extension | ~20–25 frames | ~6–10 seconds | Combo conversion, juggle extension |
| Pressure / advancing | ~15–20 frames | ~5–7 seconds | Plus frames on block, gap pressure |
| Zoning / projectile | ~20–30 frames | ~4–6 seconds | Cover approach, chip, screen control |
| Defensive / reversal | ~8–12 frames | ~8–12 seconds | Wakeup reversal, anti-pressure |
Why this matters: Kameo startup frames stack on top of your own action’s startup. If you call a 20-frame Kameo during a 12-frame normal, the assist arrives relative to the call frame, not the normal’s active frame. This is why Kameo timing is practiced as a distinct skill — you are managing two timelines.
Cancel Points & Call Windows
Kameo calls can be issued:
- In neutral — pure assist pressure or zoning.
- During blockstun — some Kameos function as a pseudo-reversal, though NetherRealm has repeatedly adjusted blockstun-cancellable Kameo interactions across patches.
- During hitstun of your own combo — the primary use for extensions. You call the Kameo between juggle hits so it connects as the opponent falls.
- During your own recovery — the Kameo can cover your whiff recovery, turning an unsafe string safe.
The core skill is buffering the Kameo call during the startup or active frames of your normal so the assist lands at the optimal juggle height. Late calls drop combos; early calls whiff or cause the Kameo to hit during your own move’s recovery.
Kameo Roles by Function
Rather than rank Kameos in a flat tier list, it is more useful to classify them by the job they do for your main:
Extension Kameos
These Kameos excel at adding hits to juggles — launching, bouncing, or re-standing the opponent to continue a combo. They are the backbone of high-damage routes.
- Stryker — one of the most-cited extension Kameos. His baton and gunfire calls give reliable juggle extensions and a strong neutral poke. His exact tuning has shifted across patches.
- Kung Lao — hat toss provides a float extension and an anti-air; versatile for both conversion and defense.
- Scorpion (Kameo) — spear provides a pull-in extension and a full-screen neutral threat.
Anti-Air & Defense Kameos
- Sub-Zero (Kameo) — ice blast and freeze calls shut down predictable jumps and create extended freeze conversions.
- Goro — armored, multi-hit calls function as jump-ins and pressure interrupts.
- Motaro — a large-body Kameo whose presence absorbs space and disrupts zoning patterns.
Pressure & Mix Kameos
- Jax — ground-pound and advancing calls create plus-frame situations and overhead/low ambiguity when layered with the main fighter’s strings.
- Sonya — ring toss and energy calls control mid-screen and enable plus-on-block pressure sequences.
- Kano — knife and ball calls provide projectile cover and gap-closing pressure.
Zoning Kameos
- Sektor — missile calls enable a zoning game layered with the main fighter’s projectiles.
- Khameleon — a rotating-assist Kameo that cycles through several legacy moves, giving flexible coverage at the cost of predictability.
Best Kameo Pairings by Roster Character
Pairing is matchup-and-playstyle dependent, but the following are well-documented, community-validated pairings. Balance shifts have moved several of these over time, so cross-check against the current meta and patch notes.
| Main fighter | Recommended Kameo | Why it works |
|---|---|---|
| Scorpion | Stryker / Sub-Zero | Stryker extends teleport conversions; Sub-Zero freeze covers Scorpion’s mid-screen approach. |
| Sub-Zero | Kung Lao / Stryker | Kung Lao float extends ice conversions; Stryker adds neutral damage to freeze punish. |
| Raiden | Stryker / Sonya | Stryker converts teleport pressure; Sonya rings cover Raiden’s zoning gaps. |
| Liu Kang | Kung Lao / Jax | Kung Lao extends fireball-pressure juggles; Jax adds low/overhead layering. |
| Kitana | Sub-Zero / Khameleon | Sub-Zero freezes extend fan juggles; Khameleon adds flexible coverage. |
| Johnny Cage | Stryker / Sonya | Stryker extends Johnny’s high-damage strings; Sonya covers approach. |
| Kenshi | Sub-Zero / Goro | Sub-Zero covers Sento stance gaps; Goro armor absorbs counter-hits during stance calls. |
| Tanya | Kung Lao / Jax | Kung Lao float extends pyromancer routes; Jax adds pressure layering. |
| Baraka | Stryker / Sonya | Stryker extends blade combos; Sonya controls mid-screen zoning. |
| Reptile | Sub-Zero / Khameleon | Sub-Zero freezes extend acid conversions; Khameleon adds coverage versatility. |
Pairing Logic
Three questions guide pairing selection:
- Does the Kameo extend your highest-damage route? If your main’s optimal combo caps at 28% without assist, an extension Kameo that pushes it to 36% is often worth more than a defensive Kameo.
- Does the Kameo cover your main’s weakness? A zoner with weak anti-air (e.g., some Kitana or Reptile builds) benefits from a fast anti-air Kameo more than a second zoning tool.
- Does the Kameo create a new mix? Layering a plus-on-block Kameo over an overhead/low string can force the opponent to block two things at once. This is where Jax, Sonya, and Kung Lao shine.
Timing Drills
Because Kameo calls operate on a second timeline, they require isolated practice:
Drill 1: The Basic Extension
Pick your main and an extension Kameo (Stryker, Kung Lao). Practice a simple launcher → Kameo call → follow-up. The goal is to call the Kameo immediately after the launcher’s active frames so the assist catches the opponent at peak juggle height. Repeat until the call is muscle-memory, not a conscious input.
Drill 2: Blockstring Kameo Layering
Run a blockstring, then call a plus-on-block Kameo (Jax ground-pound, Sonya ring) at the gap. The goal is to recognize the frame window where the Kameo call lands while the opponent is still in blockstun, forcing continued defense.
Drill 3: Anti-Air Kameo Reaction
Have a training dummy jump at set intervals. Call your anti-air Kameo (Sub-Zero freeze, Kung Lao hat) on reaction. This trains the call timing separately from your own anti-air normal.
Drill 4: Punish Conversion
Set the dummy to do a highly unsafe move (-15 or worse). Block, then punish with normal → Kameo extension. This is where most of your real match damage comes from: converting a blocked string into 30%+.
Cooldown Management
A common intermediate mistake is treating Kameo as free. Because it costs no meter, players burn the cooldown on a neutral call and then have no extension available when a punish opens up.
Rules of thumb:
- Keep your best extension off cooldown when you are at advantage. If you are pressuring and expect a counter-hit, do not spend your launcher Kameo on a chip projectile.
- Use defensive Kameos reactively, not preemptively. A wasted anti-air Kameo is a 4-second window where every jump is free.
- Track the opponent’s Kameo cooldown too. If their extension Kameo is on cooldown, you can take risks (whiff a poke, jump in) that would otherwise be punished.
Patch Considerations
NetherRealm has adjusted Kameo cooldowns, blockstun cancelability, and specific assist frame data across multiple patches. General trend:
- Kameo cooldowns were increased in early patches to reduce assist spam.
- Blockstun-cancelable Kameo loops were removed or heavily restricted.
- Specific Kameos (Stryker, Sub-Zero, Khameleon) received multiple tuning passes.
Before investing in a pairing, check the current patch notes for any Kameo adjustments. A top-tier pairing from one season can drop a tier after a cooldown increase.
Glossary
- Kameo fighter — The assist-only secondary character, summoned via dedicated input.
- Kameo call — The input that summons the Kameo for a specific assist.
- Cooldown — The post-call window during which a Kameo assist (or the Kameo system) is unavailable.
- Extension — A Kameo call that adds hits to an existing juggle combo.
- Anti-air Kameo — A Kameo call designed to intercept jumping opponents.
- Plus-on-block Kameo — A Kameo call that leaves the attacker at frame advantage on block, enabling continued pressure.
- System lockout — A brief global cooldown preventing immediate re-calling after any Kameo use.
- Juggle height — The vertical position of an airborne opponent during a combo; correct Kameo timing depends on hitting at the right height.
Sources & further reading
- Mortal Kombat 1 official site — https://www.mortalkombat.com/
- Mortal Kombat 1 on Steam (platform/store page) — https://store.steampowered.com/app/1985810/Mortal_Kombat_1/
- NetherRealm Studios official (developer) — https://www.netherrealm.com/
- Mortal Kombat Wiki (Kameo roster, frame data references) — https://mortalkombat.wiki/
- Test Your Might (community forums, frame data discussion) — https://testyourmight.com/
- Mortal Kombat 1 patch notes (NetherRealm official) — https://www.mortalkombat.com/en-us/news (balance and Kameo tuning change per season; check for the latest patch)
Next read
- For another fighter’s load-bearing resource system, see Street Fighter 6: Drive Rush, Drive Impact, and Punish Frame Data.
- For a per-round resource on the 3D side, see Tekken 8: The Heat System and Frame Data.
- For the online layer these systems play over, see Rollback Netcode and Fighting Game Latency in 2026.