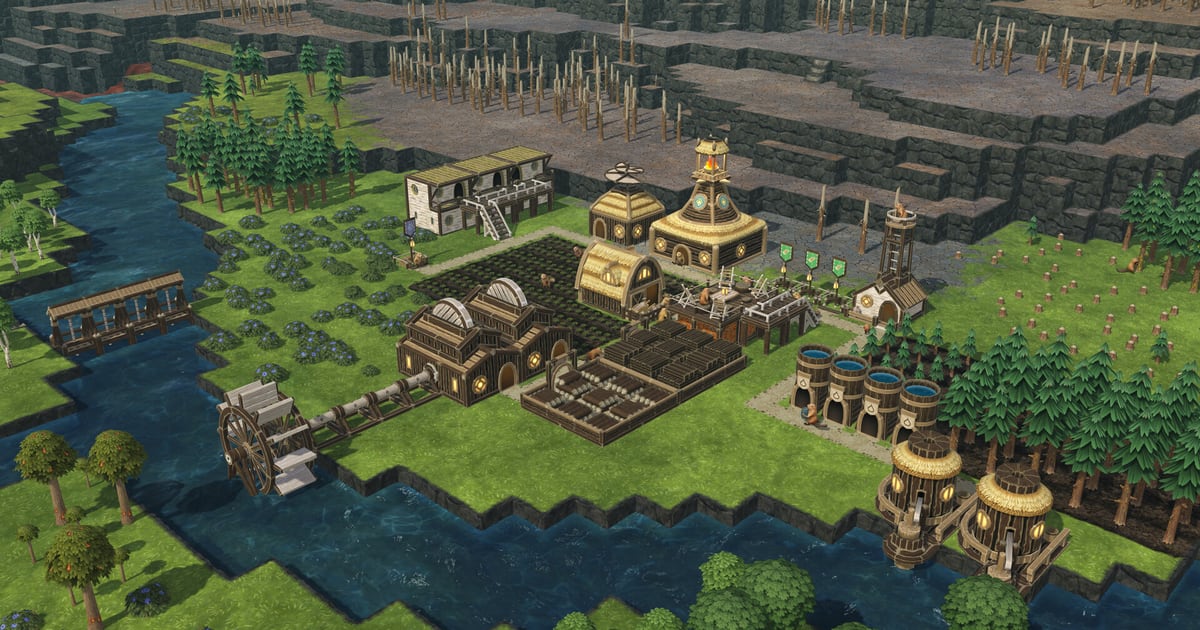
Timberborn left Early Access on March 12, 2026, and the largest system in the 1.0 mega-update was not a map or a building — it was the option to stop watching the river. Mechanistry’s launch announcement pitches automation as “over 20 new buildings that allow the player to automate their settlement’s operations: Sensors, Relays, Timers, and many more.”
What this covers: how Timberborn’s temperate → drought → badtide cycle behaves, what 1.0’s automation kit contains, and how sensors, relays, floodgates and valves combine into a working circuit. Why it matters: a badtide pushes a water source from 50% to 100% contamination over 12 hours — not a window you can babysit with the pause key. Who should care: players returning to a 0.x settlement, and anyone who would rather their pumps react to depth than to attention.
If you have played a water-scarcity survival game like Dune: Awakening, the shape is familiar: a resource that arrives on a schedule you do not control, and a build order that has to survive the gaps. Timberborn’s version adds a second, nastier phase.
The cycle you are automating against
The official wiki’s Weather page splits the year into three states. Temperate is the abundant one: Water Sources produce pure Water, and Badwater Sources produce Badwater “unless controlled with a Badwater Rig, Badwater Dome or Badwater Pressurizer set to closed”. A Drought is “relentlessly sunny, with zero chance of flowing water” — sources stop, and “the only Water and Badwater that exist during a Drought are in Tanks or Reservoirs”. A Badtide is “relentless Badwater, with zero chance of pleasant conditions”, and during one both Water Sources and Badwater Sources emit badwater.
The wiki defines a Cycle as “a pair of seasons comprised of one Temperate season and one Hazardous Weather season”. The first hazardous event is brief; later ones are not. From the wiki’s First Event Durations table:
| Difficulty | First Drought (days) | First Badtide (days) |
|---|---|---|
| Easy | 1 | 1 |
| Normal | 2–3 | 1 |
| Hard | 3–6 | 6–12 |
Event length grows after each one, and the wiki attributes the exact timing to Game Mode settings and randomness. Badtide contamination is what makes the schedule dangerous: it “begins at 50% and increases to 100% over 12 hours”, starts falling again 12 hours before the event ends, and drops from 50% to 0% the moment temperate weather returns.
The wiki also states the consequence plainly. Beavers who walk or swim in badwater may become contaminated; bots cannot. And contamination is not only a health problem: at 50% a polluted body of water “neither irrigates nor contaminates”, while above 50% it contaminates terrain with increasing range and actively kills plants — plants on contaminated ground “only survive 0.2–0.3 days”. The wiki lists two ways to cope. Divert the badwater, where “Floodgates and Valves are the main tools required”, or let it flow down the normal channels and hold the land with Contamination and Irrigation Barriers. The first is the strategy 1.0’s automation was built for.
What 1.0 actually added
Mechanistry’s press release frames the release as the end of “a wildly successful four-year run in Early Access and after seven major updates”, with more than 1 million copies sold across that period. Alongside automation, the 1.0 mega-update adds new map objects — Water Seeps, Badtide Drains, Unstable Cores, Thorns, Aquifers, Geothermal Fields and salvageable Reserve Storage — and three “unconventional” maps: Oasis, Pressure and Spillage.
Automation itself is a new toolbar category. The wiki’s Version 1 patch notes (2026-03-12) describe the basic loop with an example: a Depth Sensor activates when the water level rises above a chosen threshold; you then select a pausable building, “such as a Water Pump”, click “Automate”, and pick that sensor. “As long as the Sensor stays active, the Water Pump works” — when the level drops below the threshold, the sensor goes inactive and the pump pauses, freeing its worker.
The kit is wider than sensors and pumps. The wiki’s Automation category groups roughly twenty buildings into sensors, logic and displays:
| Building | Unlock (SP) | What its signal is built on |
|---|---|---|
| Lever | 50 | Manual on/off; pinnable to the UI |
| Relay | 80 | Logic: NOT, OR, AND, XOR, Passthrough |
| Flow Sensor | 100 | Water flow speed below the sensor |
| Chronometer | 150 | Time of day, custom range, work vs leisure time |
| Depth Sensor | 200 | Water depth below its arm vs a set threshold |
| Weather Station | 300 | A chosen season being in progress |
| Contamination Sensor | 400 | Water contamination level below the sensor |
| Power Meter | 600 | Power supply, demand, surplus, battery charge |
| Timer | 600 | Delays or oscillates a signal; can reset on a condition |
| Memory | 100 | Latches on one signal, resets on a later one |
| HTTP Lever / HTTP Adapter | 5,000 / 7,500 | Switching and exposing signals over the HTTP API |
Two names on that list matter for later. The Timer can “delay” a signal or generate an “oscillation signal instead”, and the Memory module can “switch on when one signal comes through and then reset after receiving another” — the primitive you need for state that survives a badtide and then clears itself.
How a sensor reads the river
The Depth Sensor is the one most builds start with, and the wiki is unusually specific about its limits. It reports the depth of the fluid column under its arm in metres, where one block equals one metre, and you pick the comparison yourself: greater than, less than, greater than or equal to, less than or equal to, equal to, or not equal to. The signal is On when the measured depth matches that setting.
Its geometry matters. The sensor is one block high on purpose, so it can be built inside the stream or inside a tunnel, and its body does not block flow. The arm sits at 0.50 m, and the wiki says “any fluid above this point is ignored” — the reading tops out at 0.50 m plus whatever is below. The depth measurement “stops at the first Impermeable Floor, Dirt, Dam, Floodgate, Levee, Fill Valve, or Throttling Valve encountered (starting from the arm down)”, but the sensor can read through Platforms, Suspension Bridges and Overhangs.
There is one honest caveat on the wiki. Placed over a Dam or a Floodgate, a Depth Sensor “appears to work correctly when fluid is flowing through, but is not accurate when the flow is blocked”; the wiki offers a hypothesis about stale measurement rather than a confirmed explanation. Treat readings over a closed barrier as suspect.
The other sensors cover what depth cannot see. The Flow Sensor checks flow speed, the Contamination Sensor checks contamination, the Chronometer checks time of day, and the Weather Station sends a signal while a chosen season is in progress — the cleanest way to arm a badtide routine before the forecast turns.
The logic layer: relays, gates and memory
Sensors produce signals; the Relay does arithmetic on them. The wiki lists five operations: NOT, OR, AND, XOR and Passthrough. NOT and Passthrough take a single input; AND, OR and XOR take two. (The wiki’s changelog for the Relay records a later Version 1.1 change in which AND, OR and XOR accept up to eight unique inputs.) A Relay can be built anywhere on the map — it does not need to be near what it controls — and “the output of a relay can be used as input for another relay, allowing complex decision logic.”
The patch notes give the canonical two-input build: with an AND relay, “Pumps turn on only when there is sufficient water depth AND your tanks are getting empty.” That is the difference between a pump that drains your reservoir through every badtide and one that waits for a genuine shortfall.
The patch notes also give the humble Lever a job beyond manual switching: “use a single Lever to turn on multiple Lumber Mills at once.” The Relay page adds the testing angle — with chained relays, “it can be difficult or impossible to test if everything is set up correctly because you need to wait for the right sensor conditions. This is where Levers can be useful as test signals.” A relay set to Passthrough with a Lever on input A lets you wire the output side first and swap in the real logic when it unlocks.
Floodgates and valves: what replaced the Sluice
1.0 rebuilt the water-control buildings around signals rather than around a single trick, and the clearest statement of that is the Sluice’s removal. The patch notes say the Sluice “is no longer available in the game” because the Fill Valve and Throttling Valve “can do everything that Sluice could and much more”, with sluices already placed in old saves left in place to ease the transition.
The Floodgate is the same building with a new input. A Floodgate blocks fluid “up to an adjustable height” — the wiki says heights run from 0 to 1 in 0.05 increments, water above the set level spills through, and the option to synchronize adjacent Floodgates is on by default. In 1.0, connecting a signal lets you “set the desired height based on whether the input signal is on or off”, which the patch notes describe as giving Floodgates “some of the capabilities previously reserved for Sluices”.
| Water-control job | Before 1.0 | In 1.0 |
|---|---|---|
| Hold a downstream level | Sluice | Fill Valve, which “replicates the old Sluice” regulation logic |
| Cap the flow rate | Not possible with existing structures | Throttling Valve |
| Spill at a set height | Floodgate, adjusted by hand | Floodgate driven by an on/off signal |
| Shut a badwater source | Badwater Dome, by hand | Badwater Dome, now automatable |
| Close a walking route | Not available | Gate, at will or on a signal |
The Fill Valve detail that matters is how its two states are configured. The wiki explains that a Fill Valve normally maintains a downstream level you set between 0.00 m and the top of the valve, and “when set to ‘Unlimited’ they essentially act as one-way valves”. Connecting a signal adds a second setting: the main slider becomes the value for when the signal is on, and a new field holds the value for when it is off. If you have already planned a heat network in Frostpunk 2, the mental model is the same — one system feeding a downstream consumer, with a threshold that decides when it is allowed to draw.
A circuit that holds a reservoir
Put the pieces together and you get the build the wiki calls “A Better Sluice”. Connect a Fill Valve to an upstream Depth Sensor set to greater than 0.70 m; set the Fill Valve’s On slider to 0.75 m and its Off slider to 0 m. The result “tries to maintain a downstream depth of 0.75 m while preserving an upstream depth of 0.7 m” — the downstream channel stays usable, and the reservoir cannot be drained below the depth you care about. The same page notes that a slightly better version is possible with a Throttling Valve if the upstream reservoir is large enough.
The Depth Sensor page frames the general version of this as reservoir balancing, and adds a second trick: with the arm over soil at the edge of a pond or river, the sensor “can act as a flood sensor”. That is the sensor you wire into a badtide routine — not to measure how deep the river is, but to notice that it is no longer where it should be.
From there the plan writes itself. A Depth Sensor or Flow Sensor watches the channel, a Contamination Sensor watches the water itself, and a Chronometer or Weather Station arms the whole thing as the season turns. Relay outputs feed the Floodgates that divert badwater and the Fill Valves that keep the irrigation channel topped up, and a Memory module holds a state across the event. The building you are protecting — an ordinary Water Pump — only needs a signal on its “Automate” button.
Testing a setup before the badtide tests it for you
Automation fails quietly. A mis-wired relay does nothing until the exact conditions you were preparing for arrive, which is the worst possible moment to find out. The patch notes give the 1.0 answer directly: a “Tick once” key binding, defaulting to [.], “advances the game’s time by one tick. Use it to analyze complex automation setups.” Advancing tick by tick lets you watch a signal propagate through a chain of relays instead of inferring it from the outcome.
Two more habits are worth borrowing from the wiki. Build the output side first with a Passthrough relay and a Lever as a test signal, then replace the placeholder with real logic once the sensor you need is unlocked. And use the light color customization — every automation building has a signal light, and the paintbrush icon opens preset colors plus a custom hexadecimal entry. In a dense build, a relay you have tinted is a relay you can find.
Mechanistry’s timing is worth keeping in view while you build. The press release puts 1.0’s Early Access run at four years and the studio at eight years of work on the game, and the wiki notes that Update 7 saves are compatible but that a fresh settlement is strongly recommended given the scope of the change. If you are returning, the automation layer is the part that changes how a settlement is played rather than merely how it looks.